ANNHUB: Real-time Speech Recognition using Machine Learning
- Minh Anh Vu
- Oct 21, 2023
- 4 min read
Updated: Jun 12, 2024
Introduction
Machine learning has become an indispensable technology that contributes to the success of mazing applications. Speech recognition is one of the successful machine learning applications.
In this article, a real-time speech recognition application will be described in detail.
This project is completed by a second-year UNSW university student who has only explored machine learning for a very short period of time. In order to achieve that goal, ANNHUB is used to design, train, and evaluate a neural network model to recognize 10 different non-English language words (Vietnamese), and this trained model is deployed into LabVIEW real-time application.
It takes only 1 week to complete this project, from collecting the dataset, developing a feature extraction algorithm to clean and extract features from the dataset, developing a neural network model and a real-time LabVIEW application, and deploying the trained neural model into this real-time LabVIEW application.
Data preparation
Collect Data
In order to collect voice data, a built-in computer microphone with voice recording software is used. The idea is to record a human speech (word) and save it into an audio file. Three data sets are recorded, one for training, one for evaluation, and one for testing processes. You can download these data sets from the Voice Recognition ANNHUB example link. The data structure is shown below:
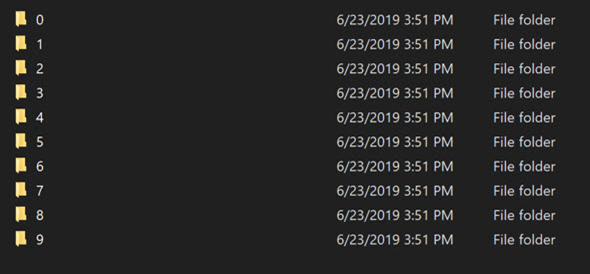
The audio file will be 1 second long, have 22050 sample/s, 16 bits per sample and contain 1 word. Every word will be recorded 45 times to provide 35 samples to train, 5 samples to test, and 5 samples to evaluate.
Feature Extraction
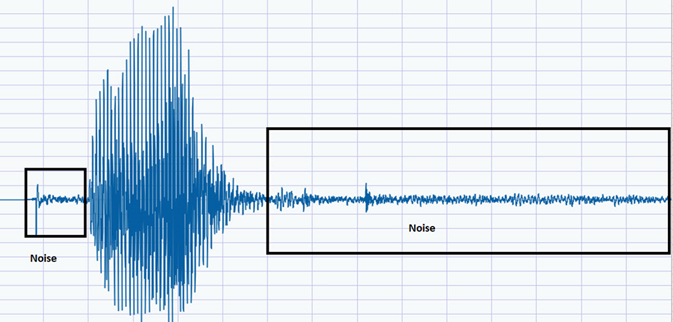
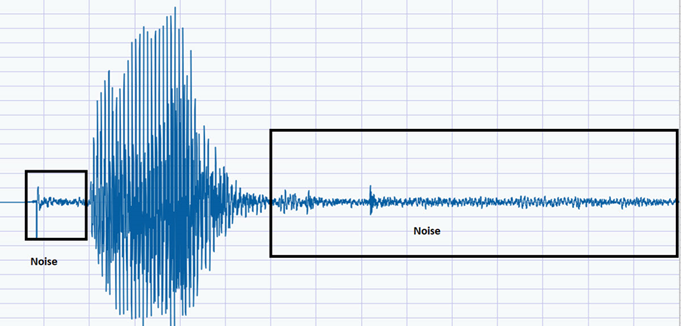
As you can see from the diagram, there are noises before and after the word, as shown below. However, we are only interested in the data of the world.
Algorithm to extract data: After recording the audio, convert it to a 1-D array, then get rid of the negative part and sketch it (as shown below).
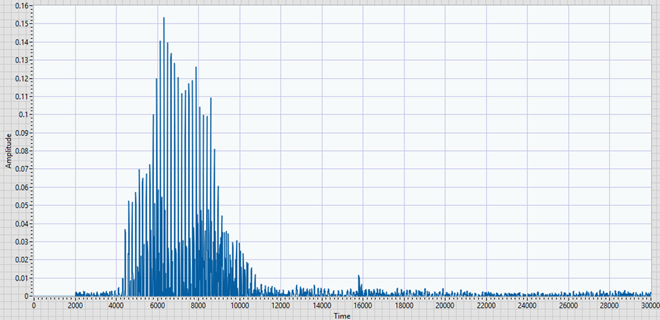
Set up a window that will move along the x-axis with 1000 samples/interaction (depending on sample rate); the width of the window will be 1600 samples (depending on the sample rate). The samples inside the window will be summed up and compared to a threshold value. If it’s greater than the threshold value (which in this case is 3.5), then the position of the window will be recorded as the start position of the word. The window will keep moving till the sum is less than the threshold value; once again, the position of the window now will be the finish position of the word.
These positions will be written into an array, as shown below. Finally, Extract data from raw data (including all the negative values).

Although clean data has been extracted from a raw data signal, audio features are not clearly visible, and it is hard to distinguish between different words just by looking at clean raw audio data. To overcome this issue, a popular feature method for audio signals will be implemented. This method is Mel-Frequency Cepstral Coefficients (MFCCs). In this article, this MFCCs algorithm is implemented in LabVIEW, For more information on this method, please visit the below links:
https://haythamfayek.com/2016/04/21/speech-processing-for-machine-learning.html
https://au.mathworks.com/help/audio/examples/speaker-identification-using-pitch-and-mfcc.html
Design a neural network using ANNHUB
Load training dataset into ANNHUB
After applying MFFCs, we will get a matrix that has 40 columns; however, we are only interested in the data from the 2nd columns to the 13th columns, taking 10 elements in each column and putting them in the 1-D array. These will be our features.
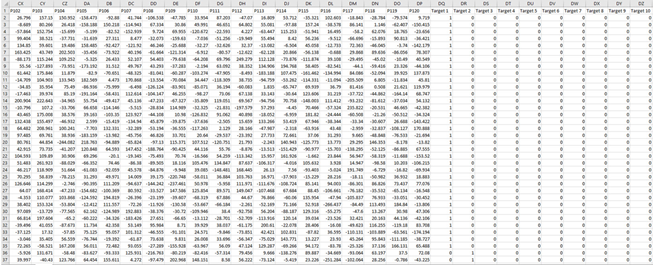
After audio features are extracted and exported in the correct ANNHUB data format, this training data can be directly imported into ANNHUB software.
Configure Neural Network
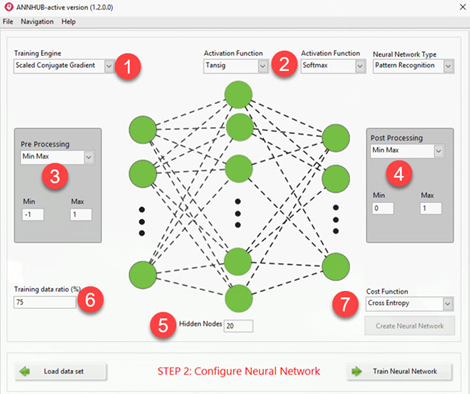
This process will construct a Neural Network model by selecting the training algorithm (1), activation functions for each layer (2), pre-processing method (3), post-processing method (4), number of hidden nodes (5), training ratio to separate training part, validation part, and test part from the training set (6), and lost/cost function (7). All configuration processes are done with a few simple clicks.
Train Neural Network
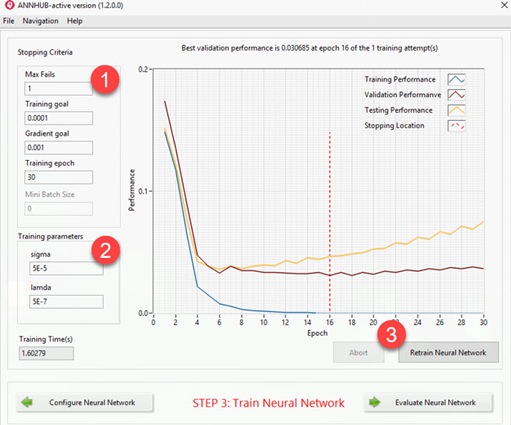
In this training page, firstly, stopping criteria are selected (1), then appropriate training algorithm parameters are specified (2) before the training can start (3). The early stopping technique is used automatically to avoid overfitting (over-trained) issues.
Evaluate the trained Neural Network.
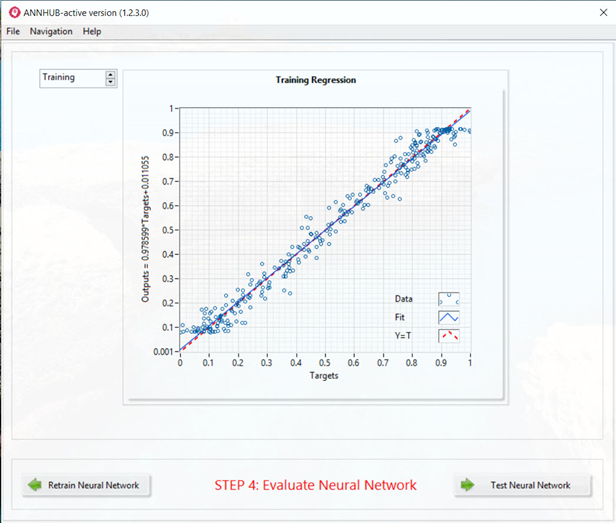
Although the advanced auto-regularization technique has been applied in the training process, we still need to evaluate the trained neural network to see if it is able to correctly model random time series data.
ANNHUB provides a built-in evaluation tool, which is regression curves, to allow us to evaluate the trained model in both training data sets and test data sets which gives us the confidence to use the trained model in actual production.
Test trained Neural Network with a new data set
After being trained, this Neural Network will be evaluated by popular evaluation techniques supported in ANNHUB, such as the ROC curve, confusion matric, and so on. The final test of the trained Neural Network on a new test dataset will be shown below:
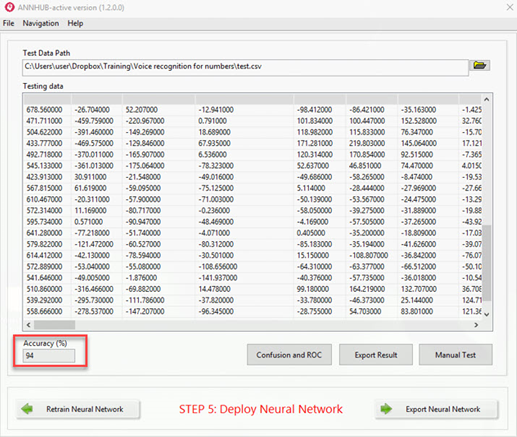
The accuracy of the completely unseen new dataset is 94%.
Export trained neural network model to weight file
After being evaluated, tested, and verified, the trained BNN time series is ready to be exported into supported programming languages for deployment.
LabVIEW Deployment
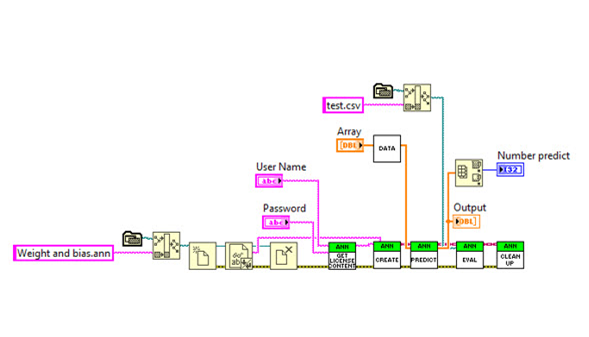
This LabVIEW application provides a starting point for a complete real-time speech recognition application. Built-in microphone and State Machine architecture will be used to fulfill this task.
In this article, a real-time speech recognition application for non-English languages has been developed. By using ANNHUB software, the Neural Network design process has been simple, and with ANNAPI (ANNHUB LabVIEW API) it is also easy to deploy the trained model into a real-time LabVIEW application.

Comments